Warning: Undefined array key 0 in /home/u566675079/domains/neocandle.com/public_html/wp-content/plugins/oxygen/component-framework/component-init.php on line 5460
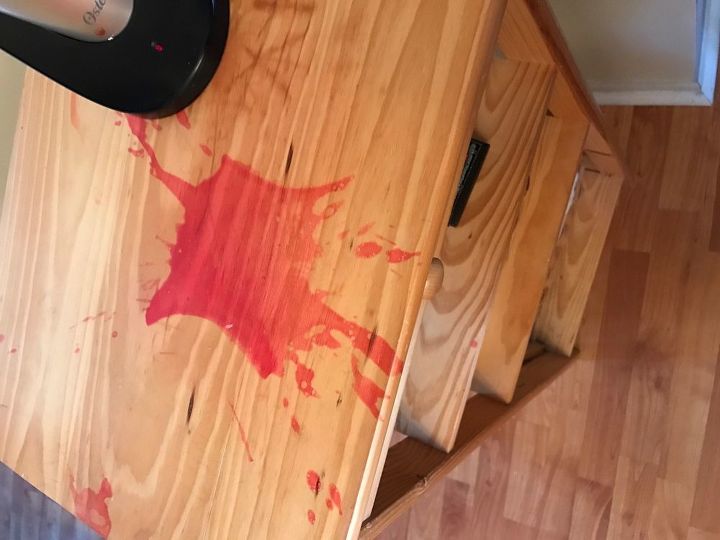
Don’t worry if you unintentionally spill hot real candle wax on your hardwood flooring or furniture.
I’ll show you the three simplest methods that have proven effective in removing wax spills from wood without causing any damage.
After waiting for the scented candle on heat to cool down, use a plastic spatula or credit card to scrape away the hardened waxy material from the candle’s surface.
To eliminate the sticky residue left by candlewicks, use a hairdryer or iron to warm up the wick so that the melted paraffin softens and peels away from the wood. Alternatively, if you don’t have either of these tools, place the candlewick into a bowl filled with water and let it sit for several hours until it has softened enough to be removed easily.
If none of these techniques work, you may also try wax removal solutions, especially for wood and other surfaces.
Though the procedures themselves are straightforward, there are a few hazards you should be aware of to protect the wood.
Read on to learn all you need to know about each technique, from the materials required and preparation tips to the detailed how-to instructions.
You’ll be able to evaluate your alternatives and pick the ideal one for you by the time you’re done here.
The time for introductions is over; let’s dive in!
Moreover, you can also read our article about how to get candle wax out of carpets.

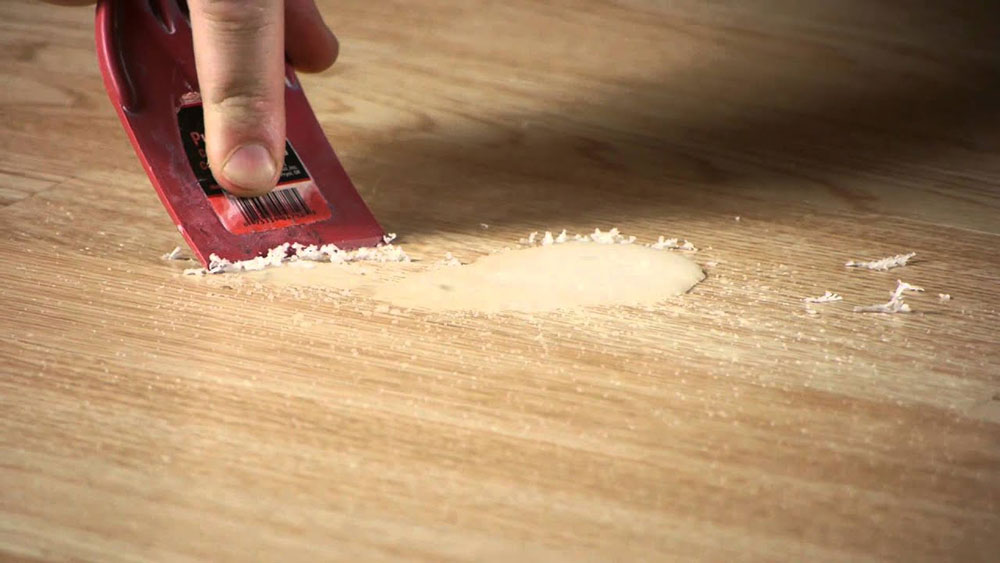
The easiest way to get rid of little wax spills is the Settle and Scrape approach.
First, scrape the wax off in the direction of the wood grain using the spatula, spoon, or one side of a credit card. Remove wax from deep cracks and crevices in your wood with the spatula’s sharp tip or a credit card’s rounded edge.
Second, gently sweep the wax shards onto the paper using the spatula or credit card as a broom and dustpan.
Third, proceed using this correct method until all traces of wax have been eliminated. You may need to repeat the scraping process to get the desired results.
Fourth, rub the affected area with a clean, lint-free cloth once the wax has been eliminated.
Fifth, after you’re happy with the results, apply furniture polish by rubbing it in with a cloth.
To remove oil, wax, and filth from wood, I advise using Orange Glo (available on Amazon), alcohol-free wood polish and conditioner. Weiman Wood Cleaner and Polish Wipes (available on Amazon) are other fantastic choices; they are revitalizing furniture wipes produced from all-natural components.
If the accident is recent, wait until the wax has cooled fully. A lack of patience is a surefire recipe for burns, ruined clothes, and an even worse mess when dealing hot wax.
Use your hands to remove as much as possible from the peel before you begin. It will reduce the quantity of scraping that must be done.
However, if you are not careful, you may end up scratching the wood. Keep this from happening as much by working with the wood grain.
Often, you can tell the grain of the wood just by looking at the orientation of the lines. However, this may not always be the case, especially with stained or painted wood.
When it happens, you may run your palm across the wood. The wood grain runs in the direction of the greatest tactile smoothness.
To prevent dye transfer, only use white or light-colored cloth while buffing and applying polish.
Lastly, use hand towels to contain errant wax and protect nearby wood surfaces.
Moreover, we have also written an article about how to get wax out of the candle jar in the best possible way.
:max_bytes(150000):strip_icc()/how-to-get-wax-off-wood-5190440-04-2ddf8516c9b640e690955bd8599c1b22.jpg)
The “Heat and Wipe” approach is the most effective technique for removing significant wax spills from wood.
Why?
Because other techniques, such as the Settle and Scrape, are only effective for removing a small amount of wax at a time. If you attempt to remove a massive glob of wax from the surface of the wood, you will almost certainly damage it. Because it does not involve scraping with sharp instruments, this technique is incredibly useful for cleaning up big messes.
In a nutshell, this procedure entails gently heating the wax to cause its composition to become more malleable. When the wax has reached the appropriate level of softness, you may remove it from your furniture by absorbing it into a paper towel or rubbing it off with a cloth. This will save your wood from being scratched.
There are two distinct approaches one may take while utilizing this technology. The first scraping method uses a blow dryer, while the second uses iron to press clothes.
Let’s dive into the specifics of the situation.
Step One: Keep the hair dryer at a distance of at least three inches from the region that is being treated.
Step Two: Turn the hair dryer down to its lowest setting and direct it toward the candle wax.
Step Three: You will wait for the wax to become pliable before attempting to peel off as much of it as possible using your hands. After that, clean the area using a towel that does not contain lint.
Step Four: You will apply heat to the area once more and then wipe it until all of the wax has been gone.
Step Five: Wipe the treated area with a cloth that is clean and free of lint, then add furniture polish and buff it.
Step One: Ensure your iron is set to its lowest setting and no steam comes from it.
Step Two: Second step is to lay down at least three layers of heavy-duty paper towels and cover the damaged area.
Step Three: On top of the paper towels, lay a clean, lint-free cloth or washcloth that can withstand being ironed.
Step Four: Place the afflicted part of the fabric under the iron and apply pressure to it for three to five seconds.
Step Five: After the cloth has been pulled back, check to see if the paper towels have absorbed the wax. If this is not the case, you will probably need to add a second or slightly raise the temperature.
Step Six: Repeat the process with a clean part of the paper towel until all of the wax has been removed from the surface. This concludes step six. It is possible that after a few heat applications, you may need to replace the paper towels; this will depend on how much wax there is.
Step Seven: Wipe the treated area with a clean cloth that does not contain lint, add furniture polish, and buff it
Additionally, you should also read our article about what to do with leftover wax.
You are free to combine any or all of these approaches to achieve your goals. After removing most of the wax from the surface with the blow dryer, you may use the iron as a secondary step to remove any remaining wax from deep crevices in the wood.
Because you must constantly apply gentle pressure with the iron on a towel to the afflicted region, removing wax with iron is more time-consuming than removing wax with a hair dryer. The wax is drawn upward into the paper towels, making this approach the most effective one to utilize when the wax is deeply buried in the wood grains. If you don’t have much time, you might attempt the procedure with the hair dryer.
If you want to use the iron approach, begin on the lowest setting with no steam setting, and raise the temperature only if the wax is not melting after a few minutes. The iron shouldn’t be excessively hot; rather, it should be warm.
It would help if you placed multiple pieces of tissue on the candle before lighting it. It’s important to use enough tissues, so they don’t burn through. If you don’t use enough tissues, the candle flame may drip onto your clothes, causing them to melt and stick together.
If you want to prevent the iron’s surface from ever touching wood, you may use a big washcloth.
Make sure you know what kinds of fibers make up your washcloth so that you don’t accidentally burn it when you’re using it.
:max_bytes(150000):strip_icc()/how-to-get-wax-off-wood-5190440-03-04c5a2a7fef8402e8ab16bfa8d2ff14a.jpg)
Because it is a pretty rapid cure and doesn’t need heat, the Freeze and Scrape approach is one I recommend if you want your children to assist you in fixing the problem.
This Old House, winner of an Emmy and a reliable resource for homeowners and lovers of do-it-yourself projects since 1979, suggests using this approach, which entails freezing the wax using ice.
First, place a few ice cubes inside a plastic bag and seal it.
In the second step, you will aid in freezing the wax by placing the bag over the afflicted region for one minute.
Step Three: To carefully remove the cool wax, you can use a plastic spatula, a plastic spoon, or a credit card. It will normally come off in one piece of paper, although there is a possibility that some wax residue may be left behind.
Step Four: With the assistance of the spatula or the credit card, gently scrape the residual wax.
Step Five: After the wax has been removed, wipe the area with a lint-free cloth and the furniture polish of your choice. Buff the surface until it is smooth.
Apply a sufficient amount of ice so that it covers the afflicted region. It is important to remember to use a clean, lint-free towel as a buffer between the wax stain and the bag of ice to prevent the wax from becoming wet due to condensation.
When the wax is exposed to cold, it undergoes a process that causes it to become more brittle, making it simpler to break apart and remove wood surfaces.
If the wax is thoroughly ingrained in the wood grain, and even after using this approach, there are still residues left behind, you may want to consider using the Heat and Wipe method to complete the process.
In its natural state, wood is hygroscopic, readily absorbing and holding onto the water like a sponge.
Most wooden floors and furniture are protected by a thin coating of polyurethane which prevents any damage to the wood itself.
If you accidentally get some hot liquid on an uncoated wooden surface. In that case, the liquid will soak into the pores of the wooden surface, making it extremely difficult to clean off the liquid.
If the wax used for sealing furniture has any dyes or color tinges, it could leave a permanent mark on the furniture’s surface. This is due to the porous nature of untreated clean wood surfaces, which allows water stains to seep deep into the layers of the material.
If you find that you are in this predicament, try not to freak out.
With an iron serving as the heating element, the Heat and Wipe method is the best way to remove unwanted oil stains from unfinished wooden surfaces.
As I said previously, the following is what you are going to need to do:
Because the medium heat from an iron melts the waxy residue left by previous coats of paint, the Heat and Wipetechinque works best on unpainted wooden surfaces. Other techniques, such as the Settle and Scrapewill, cannot remove the waxy residue that has been embedded into the grain of the wooden surface.
If the Heat and Wipe approach doesn’t work despite your best efforts, you might need to sand the wood carefully.
I would advise you to consult a professional for assistance if you are dealing with an expensive piece of furniture. You may receive a free estimate of costs by visiting websites such as HomeAdvisor and requesting a quotation.
Moreover, it would help if you also read our article about how to store candles so that you can keep your wooden floor clean.
